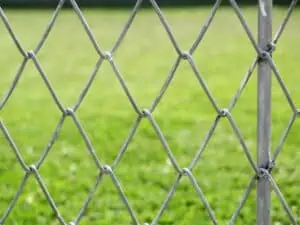
How to Install a Chain Link Fence?
Chain link fences are an inexpensive and durable way to enclose your yard, but they do require some careful installation. Fortunately, the process is relatively straightforward and doesn’t require a contractor. You just need to know how to install a few essential parts of the fence and avoid some common mistakes.
(Looking for “Fence building services” Contact us today!)

1. Set Posts
The first step is to mark your property lines for the fence. Then, dig out the post holes in the proper position. Be sure to bury the posts at least four inches inside your property lines to prevent concrete footings from encroaching onto your neighbor’s property.
2. Locate the Posts
Next, determine the location of your line posts, end posts and corner posts. Use a marking paint or stake to mark the location of each post before you start drilling them into the ground.
3. Dig the Post Holes
Make your chain link fence more durable by digging post holes three times wider than the post diameter. For example, if your fence post is 6-inches in diameter, then you’ll need to dig post holes that are 8-inches wide and 6 inches deep. Fill each hole with a mixture of gravel and concrete. If you are installing a fence in a hard-rock yard, you’ll need to add extra cement to the bottom of the hole.
4. Tamp the Posts
Finally, you need to tamp the top of each post to smooth out the rough edges. You can use a hand tamper or a 4-foot x 4-foot post to tamp down the post.
5. Secure the Posts
The last part of the fence installation process is to secure the posts to the ground. This involves a few different steps, and it’s best to have a fencing expert do the work for you.
6. Connect the Posts with the Top Rail
The top rail is the part of your fence that you see when you look at it. It provides support to the chain link fabric on either side of the fence. You’ll need to attach the top rail to the top of your line posts and end posts using a top rail cap, or an end post cap if you have one.
7. Attach the Fence Wire to the Top Rail
After the top rail is fixed to the top of your posts, you need to fix the line wire to it. This is a simple process that uses eye bolts and nuts. This will keep the top rails from coming loose.
8. Finish and Hang the Fence
After you’ve put in all the necessary posts, you can continue the process of building your chain link fence. You’ll need to complete a few other things, like connecting the top rails together and finishing the fence.
9. Attach the Tension Bars
The tension bars that are woven into the ends of your chain link fence fabric at your end posts, gate posts and corners are designed to give your fence more strength. However, they can also cause problems if not properly installed. Especially if you have trees near your fence that could grow into the fence and damage it.

