How to Build a Vinyl Fence?
Whether you are a homeowner or a property manager, installing a vinyl fence can be an effective way to define your property. Fences can also provide privacy and security to your property and keep your kids safe. But there are some things you need to know before you start.
(Searching in Google “fencing missoula mt“? Contact us today!)
The first thing you need to do is lay out the project. You need to know the dimensions of the posts, rails, and panels you are going to install. A simple fence plan can help you determine how many posts you will need and what materials you will need to buy.
Next, you need to figure out how to put the fence together. There are two main types of vinyl fences, board and rail and panelized. Board and rail fences have individual boards, while panelized fences have individual panels that hang between posts. For panelized fences, you will need rail brackets to connect the rails to the posts.
If you are installing a board and rail fence, you will need to cut rails to fit the slope of your property. You will also need to drill holes in the posts for the rails to go through. A handyman can help you with this process.
Next, you need to place the posts on the ground. You can do this by digging holes, but this can be a time-consuming and difficult task. It is best to make sure the holes are deep enough to hold the posts. The depth of the holes will depend on how long your posts are. Also, you will need to make sure you have a gravel base to hold the posts in place. You should also make sure that the posts are level.
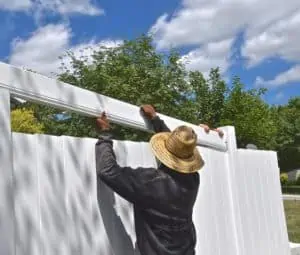
After you have placed the posts in the ground, it is time to attach the rail brackets to the posts. This should be done according to the manufacturer’s instructions. You can also use the provided hardware to secure the rails to the posts.
To add some style and flair to your fence, you may consider installing a picket trim. You may also want to install a gate. You can use landscape stakes to stake out the fence line and gate. You may also need to use a level to ensure that the gate is level. The gate may also be a good place to use a power augur, which is a tool that can finish a day’s worth of work in a single day.
To finish the fence, you will need to install the top rail and bottom rail assemblies. You may want to attach these assemblies to the posts using metal rails. These rails will beef up the bottom rail and add strength to your fence. You may also want to use a level bubble tool, which is a $5 tool that will help you force the post into the concrete. It will also smooth out any exposed concrete.
The last thing you will need to do is install the post caps. This may seem like an unnecessary step, but it will give your fence a professional look. A post cap will help to hold the post in place.