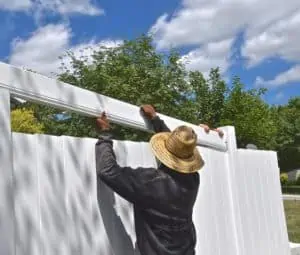
How to Install a Chain Link Fence Gate?
The installation of a chain link fence gate is a simple process that requires a few tools and some hands-on work. It is recommended that you wear protective eyewear and a hat to protect your face and head from damage. Also, watch out for bystanders on the other side of the fence, especially children.
(Searching in Google “DIY metal fencing“? Contact us to know more!)
The first step is to lay out a perimeter of the fence. This can be done with mason’s line or batter boards. The perimeter should extend four inches away from the property lines on both sides. Once the perimeter is laid out, make sure to cross the mason’s line at each corner.
Depending on the type of fence gate you are installing, there are a few things that you will need to have on hand. These items include the fence, gate frame, hinges, and brace bands. You will also need new tension bars. These bars will attach the fencing to the top rail. Once you have these parts, you will be able to assemble the gate. Having all these pieces together will help to ensure that your fence is sturdy and secure.
To start, you will need to install two gate posts. These posts should be taller than the line posts. These posts will need to be cured and plumb before you can install them. The bottom of the posts should be at least 6 inches deep. If the slope is steep, you will need to build a downward slope around the posts. To make the slope, dig a hole about 30 inches deep and 6-8 inches in diameter. Then, fill it with concrete. This will create a downward slope and eliminate any lateral grade.
Once the posts are in place, you need to cut the chain link to fit the gate post. You can use a chop saw or bolt cutters to do this. Some of the chain link will spring back when you pinch it. Alternatively, you can peel it back to miss the post.
Next, you will need to install the latch pin and latch catch. These items should be positioned to opposite ends of the post. Once these are in place, you can tighten them with a socket wrench. The latch should be measured according to the manufacturer’s instructions. Once you have the correct measurements, you will need to insert the pin into the latch catch. Having these components in place will allow you to close and open the gate.
Once you have the fence in place, you can then assemble the sliding parts. This includes the top rail and brace bands. These can be attached to each other with tension wire. The tension wire should be wrapped several times to make sure that they are secure. Once you have finished this, you can remove the tie wires.
The last step is to secure the fence. This can be done by tying weights to the ends of the tie wires. You can also crowbar the end of the fence. Be careful not to puncture the chain link with your crowbar. It is a good idea to wear goggles.